Establishing Pay Groups
Use the Pay Groups form to set up a group of employees who are all paid on the same day. You must assign every employee in PrismHR to a pay group.
Use the Actions menu to access other information and setup forms:
| • | Audit
|
| • | Pay Schedule Report – runs the Pay Schedule Report. |
| • | Pay Schedules
|
| • | Show employees – lists employees enrolled in the pay group. |
| • | Time Sheet Defaults – defines default pay methods and pay codes for this group. When the timesheet is created, the system populates the default hours in the listed default pay code for employees assigned to that pay method. For example, if the pay method is Hourly and the pay code is REG2 in the Time Sheet Defaults panel, then employees with the Hourly pay method will have their default hours populated in the REG2 pay code in the timesheet. |
Note the following:
| • | The Variable Salary option only displays if the VARSALMETHOD custom feature code is enabled on the System Parameters form. |
| • | After you enable the VARSALMETHOD custom feature code and select the Variable Salary option, this update takes effect in the next regularly scheduled payroll. |
Defining a Pay Group
Define the pay group that represents a group of employees paid on the same day and establish the pay schedule using the Pay Group panel.
To define a pay group:
| 1. | Select a . |
| 2. | From Payroll|Change, select Pay Groups. |

| 3. | Complete these fields in the Pay Groups panel as required: |
| Field | Description |
|---|---|
| Pay Group | Enter the pay group code for the client. |
| Description | Enter a brief pay group description. |
| Pay Schedule |
Enter the pay schedule for the pay group. If you change the pay schedule and employees are assigned to that schedule, the following message displays, "You cannot change the pay schedule of this pay group because there are employees assigned to it. You will need to create a new pay group and assign the employees to it using the Mass Change Pay Group form." |
| Work Week Ends On | Select the day of the week that the work week ends on. |
| Processing Schedule | If needed, enter the processing schedule. |
| 4. | Click Save. |
Note: Select the Payroll Control link to access the Payroll Control form, where you can establish essential information for processing payroll in PrismHR.
Entering the Payroll Period in Progress Information
The Payroll Period in Progress panel displays the payroll and pay date information.
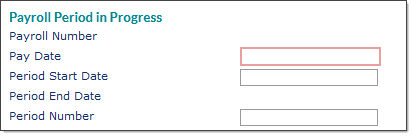
To set up in-progress payroll information:
| 1. | If this is a new pay group, enter the information for the first payroll period. |
| 2. | Complete the following fields: |
| Field | Description |
|---|---|
| Payroll Number | The system automatically assigns the payroll number. |
| Pay Date | The effective date of the next payroll batch and the date that appears on the payroll check. If there are no payrolls pending for the pay group, enter the first valid pay date. Otherwise, this field is read-only. |
| Period Start Date | The first date of the payroll period. If you are creating a new pay group, enter the first day of the pay period. |
| Period End Date |
The system calculates this date based on the start date and schedule. The Period Number is based on the number of periods possible to pay a group in one year: a weekly pay group has 52 pay periods, a Bi-weekly group has 26 periods, a semi-monthly pay group has 24 pay periods, and a monthly group has 12 periods. |
| Period Number | The system populates the period number that corresponds with the pay period. |
| 3. | Click Save. |
Entering the Alternate Billing Addresses
Use the Alternate Billing Address panel only if the billing for this pay group should go to a different address than what is listed on the Client Details > Account tab.
Note: This alternate address affects billing only.
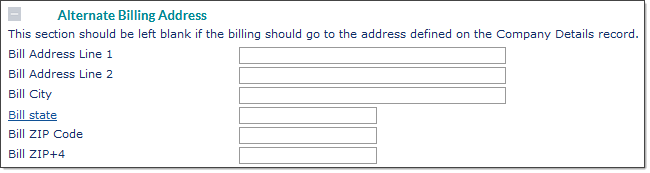
Enter the alternate billing address information (if required).
Performing Pre-ACH Maintenance
Use the Pre-ACH Maintenance panel to test ACH files a specified number of days before running payroll to ensure that all transactions can be completed.
Note: See Pre-ACH Processing
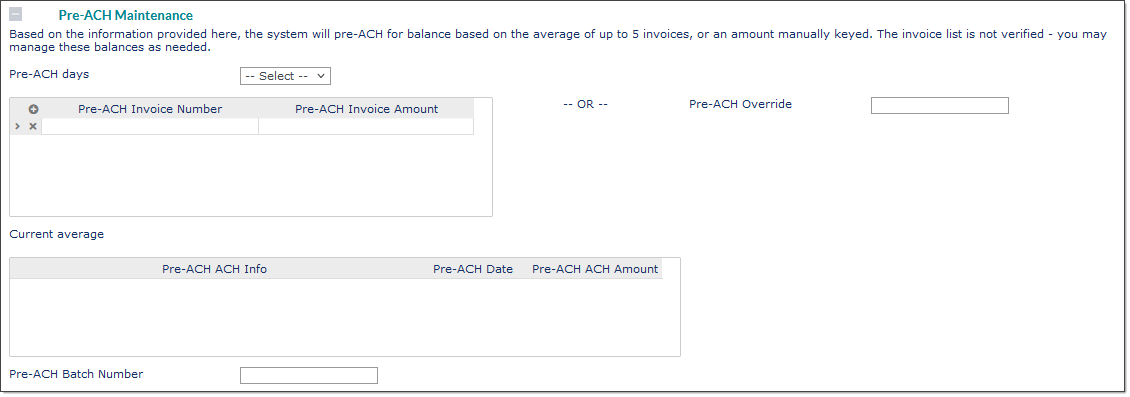
To set up or maintain Pre-ACH settings for a pay group:
| 1. | Make sure to specify the appropriate pay group. Its information populates on the form. |
| 2. | If appropriate, select the number of Pre‑ACH Days. The system sends a pre‑ACH file ahead of the regular ACH file by the number of days selected. This number must be less than the cycle length for the feature to work correctly. |
If your organization is not using pre‑ACH processing for this pay group, you must set this field to ‑‑Select‑‑.
| 3. | The system can use either an average or a flat amount for the pre‑ACH: |
|
Pre-ACH Amount Type |
Details |
||||||
|---|---|---|---|---|---|---|---|
|
Average |
Use the pre‑ACH invoice fields to specify an average for up to five invoices. You can enter any information in the Pre‑ACH Invoice Number and Pre‑ACH Invoice Amount columns, because the system does not verify it. For example, if you are setting up a pre‑ACH prenote on the client for the first time and plan to use five invoices for the average that will typically be around $10,000, you can enter five “starter” invoices using any invoice number (for example, START1, START2, START3, and so on) and enter $10,000 for each. When the system processes a real payroll, it drops the first starter invoice from the list and inserts a real invoice at the end. After the first five payrolls, all the starter invoices are no longer on the list. The system sends pre‑ACH prenotes using the average of the invoices in the list. After five payrolls, the average will be based on actual data.
The Current Average displays below the table. |
||||||
|
Flat |
Enter the Pre‑ACH Override to use a flat amount rather than the Current Average of invoices and amounts. If you use the flat method, the system always uses that amount for pre‑ACH for the client and this pay group. The system never checks nor averages the invoice amounts. |
| 4. | If setting up Pre-ACH for the first time, enter the batch number of any completed batch in the Pre‑ACH Batch Number field. |
For each pay group, the daily Pre-ACH program compares the in-progress batch number with the batch number entered in this field. If these are identical, the system skips the in-progress batch for Pre-ACH processing. When you enter the ID of a previously completed batch, you indicate that PrismHR needs to process the in-progress batch for Pre-ACH. The system will evaluate the in-progress batch for processing, create the appropriate ACH entries, and automatically update this field with the in-progress batch number. This prevents double entries from occurring.
Note: In the case where Pre-ACH entries were already created for a batch, but this batch was later deleted and re-created (therefore giving it a new batch number), you must manually update this field with the new batch number. For example, assume a Pre‑ACH prenote was sent for batch 202202, but for some reason you decided to delete that batch and create the next regular payroll batch to replace it. If the system assigns number 202205 to the new batch, you must change the value in the Pre-ACH Batch Number field from 202202 to 202205. This ensures that PrismHR does not re-transmit the Pre-ACH entry.
| 5. | Click Save. |
