Managing Documents in Document Management
To manage employee documents in Employee Portal (EP), use the Manage Documents form. The documents shown depend on the document categories assigned to the manager's user role. For more information on assigning document categories to managers, see the Document Management Quick Start Guide on the Customer Resource Center, or the PrismHR in‑product help.
Adding the Manage Documents Menu to Employee Portal
For managers to view their employee document in EP, you must add the Manage Documents menu to the template on the Configuration Templates form in PrismHR. The Manage Documents menu is visible to managers only.
To add the Manage Documents menu option to a template:
-
Click Work Centers.
-
From Work Centers|Employee Experience, click Employee Experience Configuration.
-
Click Configuration Templates. The Configuration Templates form displays.
-
Click
 (Edit) for the template assigned to the client.
 -
Click the Menu tab.
-
In the Manager Navigation section, Manager Area.
-
Click
 (New Sub Menu). The New Sub Menu option is added to the Manager Tools menu.
 -
In the Title (en) field, enter Manage Documents.
-
In the Navigation Actions panel, select Component.
-
In the Component drop-down, select Manage Documents.
-
Click Save.
After adding the menu to a template, managers can view their employees documents.
| Field | Description |
|---|---|
|
Name |
The name of the folder or document. |
|
Last Modified |
The date the folder or document was last edited. |
|
Category |
The document category assigned to the document. |
|
Description |
The document category description. |
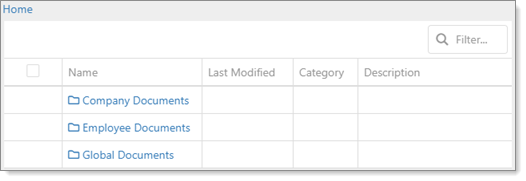
Documents are assigned to one of the following categories:
| • | Employee Documents: Employee documents are assigned to a specific employee. Only the employee, managers, and service providers with access to the employee can view their documents. |
| • | Company Documents: Company documents are assigned to a specific client. Only the employees and managers of that client can view their documents. |
| • | Global Documents: Global documents can be made available to multiple clients by assigning a document category at the template or client‑override level. |
Selecting a directory displays sub‑directories and documents within that directory. Selecting a document or file displays icons to manage that file.
| Icon | Description |
|---|---|
|
|
Displays the Document Details page. |
|
|
Rename the document. |
|
|
Edit the document category description. |
|
|
Delete the selected document. |
|
|
Download the document. |
|
|
Upload a document. |
|
|
Access the Bulk Import form to upload multiple documents. |
|
|
Change the document category. |
Uploading a File
To upload a file to PrismHR:
| 1. | Go to the directory where you want to upload a file. |
| 2. | Click |
| 3. | Select a file from your local machine. The Upload Documents page displays. |
| 4. | Enter a description for the file and click Upload. When the file uploads, the file displays in the selected directory. |
Uploading Multiple Files
You can upload documents in bulk and have the files automatically sorted to the proper clients using the Mastertax Bulk Import tool.
What you Need
Before you begin, make sure you have:
| • | Permissions to access the Bulk Upload tool. This tool requires specific permissions for each individual to use the tool, and cannot currently be added to a User Role. If you do not have the proper permissions, contact the administrator. |
| • | A Zip file from Mastertax containing the files you want to upload, and files containing the proper naming convention. For more information about the required formats, see the next section. |
Correct Zip File Format
For the Bulk Import tool to read the documents in the Zip file correctly, the files must conform to certain naming conventions. Mastertax should already deliver the Zip file in the format below.
The name of the Zip file does not affect the upload, but the name will be used for the Description field for all the documents imported in that upload. For best practices, you should give the Zip file a name that describes the documents, such as "Q1 2024 Mastertax Upload" for first-quarter 2024 tax documents.
The naming convention of the tax files is very important for the files to be read correctly. Mastertax files should be named according to the following rules:
-
The document name must be in the following format: xxxxx_C1234_xxxxx.abc
-
The first and last sections of the document name (marked "xxxxx" above) can be any alphanumeric characters. They cannot contain spaces or special characters.
-
The client ID (marked "C1234" above) must first contain a "C" or an "E", followed by the Client ID number.
-
The file extension (marked ".abc" above) can be any supported document type, such as pdf, doc, or txt.
For example, if the Client ID is 3245, the tax file should look like this: "Q12024_C3245_mastertax.pdf".
The Bulk Import Form
The Bulk Import form displays the status of past bulk imports, and can be used to add a new bulk import.
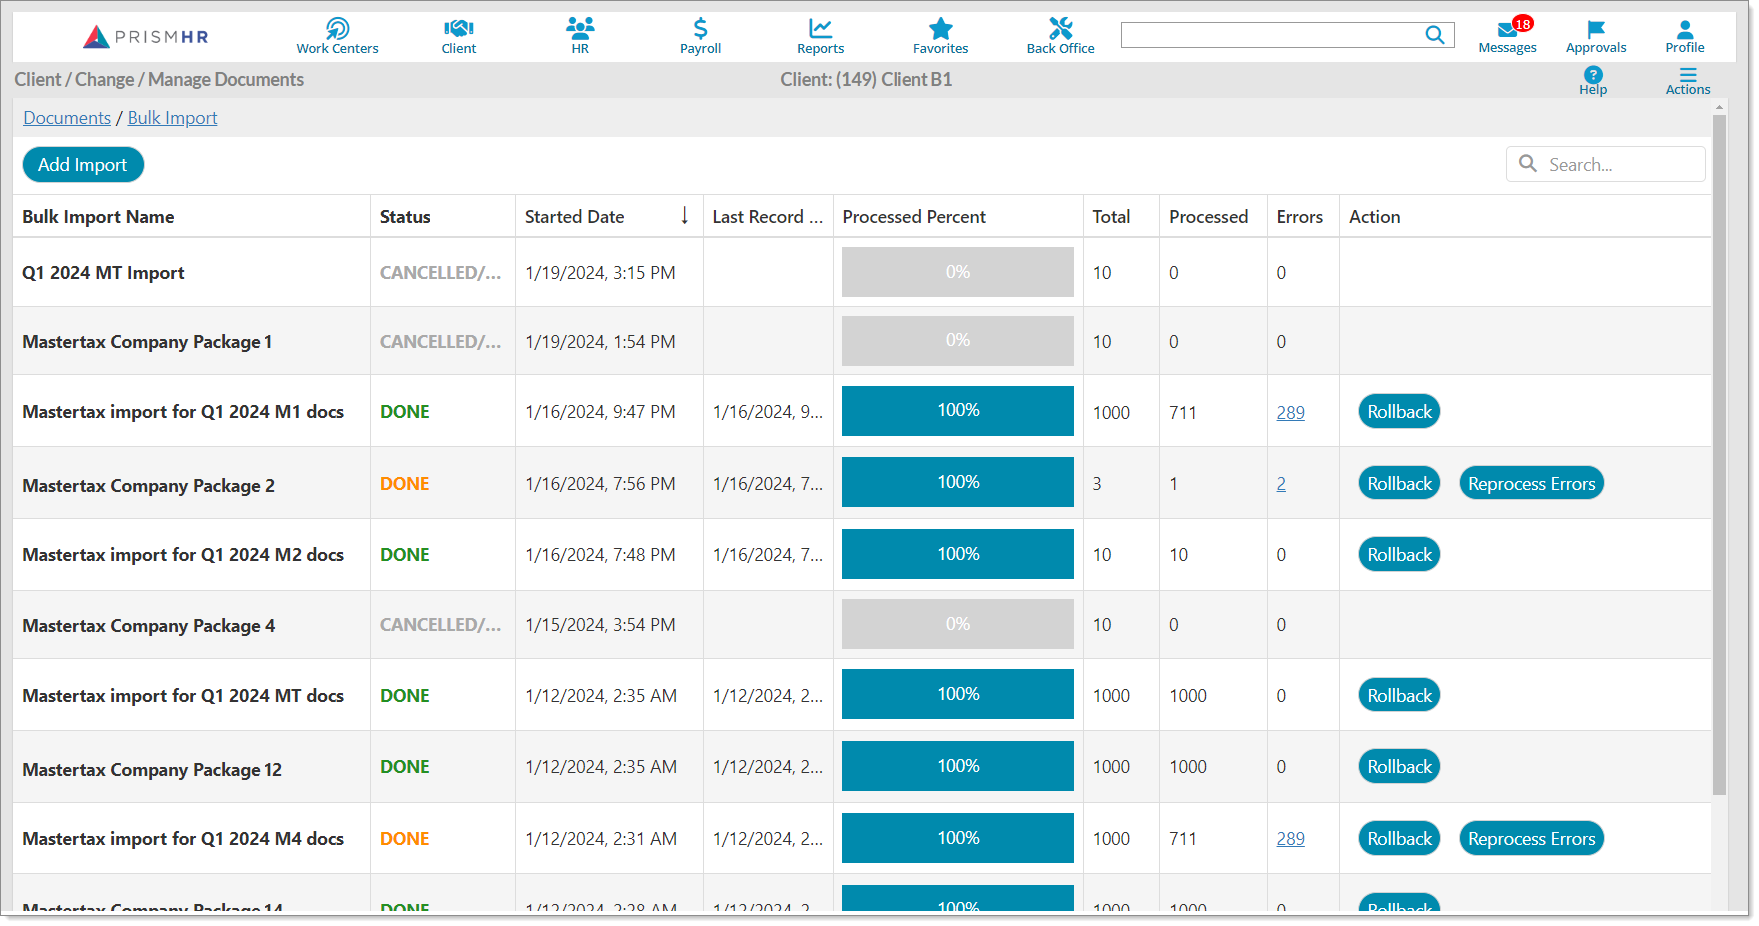
The following fields display on this form:
-
Bulk Import Name: Displays the name of the bulk import job.
-
Status: Displays the status of jobs that are Done, or jobs that have been Cancelled/Rolledback.
-
Started Date: Displays the time that the bulk import began.
-
Last Record Processed: Displays the time the bulk import completed.
-
Processed Percent: Displays the percent completion of the project as it is processed.
-
Total: Displays the total number of files contained in the Zip file.
-
Processed: Displays the number of files that were successfully processed.
-
Errors: If the system encountered errors during processing, the number of errors displays as a link. Click the link to display the Import Errors form, which displays each file that encountered an error and the source of the error.
-
Action: Using the Action buttons, you can roll back a completed bulk import or reprocess errors encountered during the import.
How to Perform a Bulk Import
To perform a bulk import:
| 1. | On the Bulk Import form, click Add Import. The New Bulk Import form displays. |
| 2. | Enter a name for the import in the Bulk Import Name field. This name is used as a description for the import in the system. |
| 3. | Select a category for the import in the Target Category field. The field only displays categories that you have permission to access. |
| 4. | Click Select Zip File. A file selection form displays. |
| 5. | Select the Zip file that has been prepared according to the formatting standards listed above. |
| 6. | Click Start Bulk Import. |
The bulk import begins processing, and the Bulk Import form displays, where you can review the status of the import.
How to Review and Reprocess Errors on a Bulk Import
When you run a bulk import, the system displays the total number of files to be imported, the number successfully processed, and the number of files that were not imported due to errors.
Note: Errors due to mistakes in formatting, unsupported file types, or files that contain 0 bytes cannot be fixed directly using the reprocessing method. To fix these errors, you will need to make changes to the documents on the Zip file and redo the import.
To review errors on a bulk import:
| 1. | On the Bulk Import form, select the import that has processing errors. |
| 2. | Select the link in the Errors field. |
The Import Errors form displays.
Each file with a processing error displays on this form. The File Name field displays each file, and the Exception field displays the corresponding error message.
Bulk import errors can be fixed according to the type of error:
-
If the error indicates the user does not have access to the client, the user must obtain the proper permissions to access that Client ID.
-
If the error indicates the Client ID does not exist in the system, one of the documents is likely named incorrectly and must be renamed.
-
If the error indicates the file did not match the expected format, the document from the Zip file must be corrected.
-
If the error indicates the file type is not supported, the Zip file contains incompatible file types, which could not be processed.
-
If the error indicates that a system timeout or connectivity issue prevented the file from being imported properly, the file can be re-imported using the Reprocess button.
To reprocess a bulk import:
| 1. | On the Bulk Import form, select the import that has processing errors. |
| 2. | Click Reprocess Errors. |
The system attempts to reprocess files that returned errors. Any errors which remain after reprocessing are likely due to file formatting, file type, or permissions issues, and can be reviewed on the Import Errors form.
To roll back a bulk import:
| 1. | On the Bulk Import form, select Rollback. |
The Confirm Rollback button displays.
| 2. | Select Confirm Rollback. |
The rollback commences, and all processed files from the import are removed from the system.
