Managing the Appearance
On the Appearance tab, you can select several options for a template. These include:
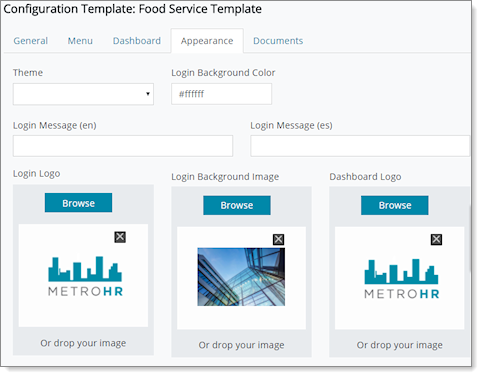
| • | Theme |
| • | Login background color (for the Login page) |
| • | Login message (English and Spanish) |
You can upload images for:
| • | Login logo |
| • | Login background image |
| • | Dashboard logo |
Note: When you add or change an item on the Appearance tab, the system updates all clients associated with the template.
To customize the appearance of the template:
| 1. | Click the WORK CENTERS menu. |
| 2. | From the Employee Experience Work Center, click Employee Experience Configuration. The Employee Experience Configuration form opens. |
| 3. | Click Configuration Templates. The Configuration Templates form opens. |
| 4. | Click the Appearance tab. |
| 5. | Complete the following: |
|
Use this option |
To do this |
|---|---|
|
Theme |
Select a theme. |
|
Login Background Color |
Enter a hexadecimal value. You can also click the text box to display a color palette. Use the color slider or move your cursor on the palette. |
|
Login Message |
Enter the text to display when a user first logs in. |
|
Login Logo, Login Background Image, Dashboard Logo |
To upload a logo, click Browse. Select an image to upload and click Open. |
To apply the changes to specific clients, click Apply to Client(s). In the Client Search, select the clients to use the template and click Apply.
| 6. | Click Save. |
Note: To remove a logo or background image, click Delete next to the image, then click Save. The image is not deleted until you click Save.
